
Mastering Stability: Your Guide to Adjusting Cabinet Legs for a Perfectly Level Installation
Embarking on a kitchen, bathroom, or laundry room renovation can transform your home, but the key to a seamless aesthetic and functional space lies in the details. One of the most critical yet often overlooked details is the stability and level of your cabinets. Adjustable cabinet legs play a pivotal role in achieving this perfection. In this guide, we'll walk you through the steps to expertly adjust your cabinet legs for a level and steadfast installation, ensuring your renovation stands the test of time.
Why Adjustable Cabinet Legs Matter:
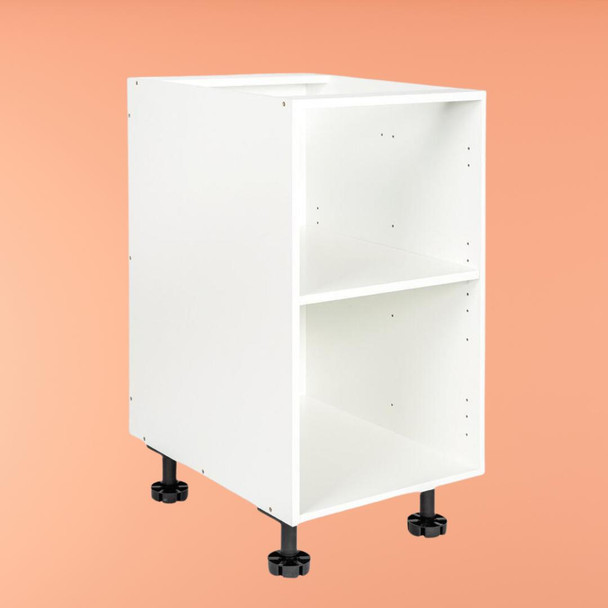
Before diving into the how-to, it's essential to understand the significance of adjustable cabinet legs. Unlike traditional fixed-height legs or ladder frame bases, adjustable legs offer unparalleled flexibility and precision. They compensate for uneven floors, support heavy countertops, they lift the cabinetry off the ground and facilitate airflow to prevent moisture build-up, especially crucial in kitchens and bathrooms, those wet rooms.
Step 1: Preparing for Installation
Assess the Floor: Begin by checking the levelness of your floor using a spirit level. Identify high and low spots across the area where the cabinets will be installed.
Measure and Mark: Based on your findings, determine the lowest point of the floor. This will be your
reference for setting the correct
set-standard height of the cabinet legs. The reason we work from the lowest point of the floor is
due to the set height of the kickboard panel which for our flatpack kitchen
cabinetry is 150mm in height. By starting off from the lowest point we can then
wind up the cabinet feet at the higher floor levels, so that our maximum
adjusted foot height always remains 150mm to suit the height of the kickboard
which will get fitted off at the end. The kickboard will simply be cut shorter
where the feet have been adjusted to suit the floor levels.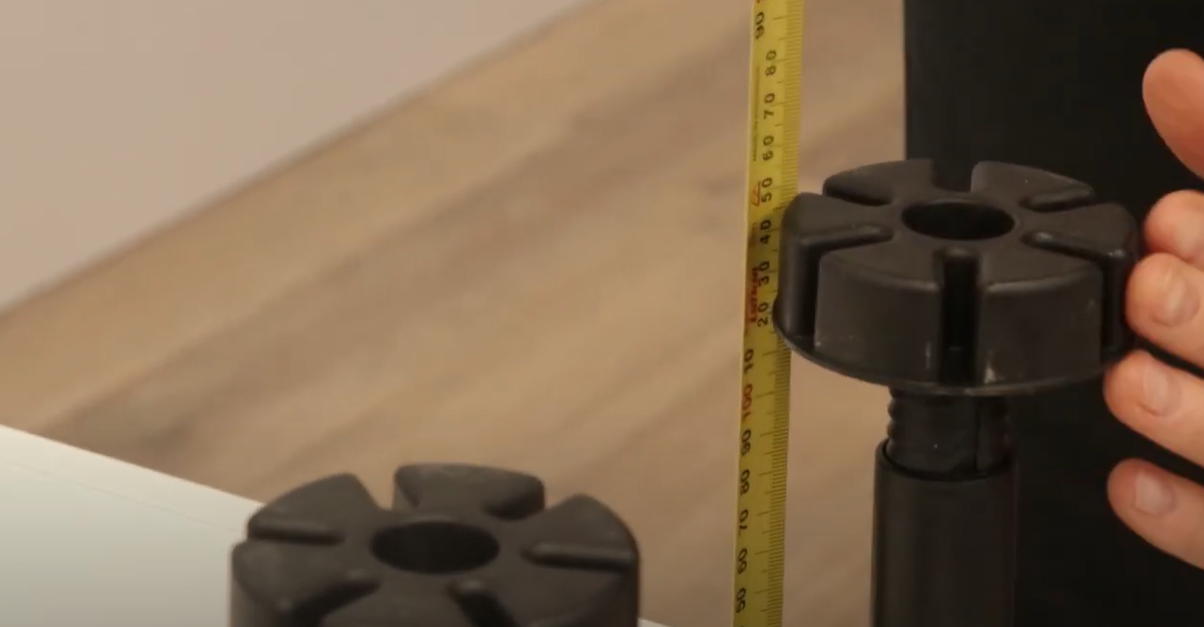
Step 2: Adjusting the Legs
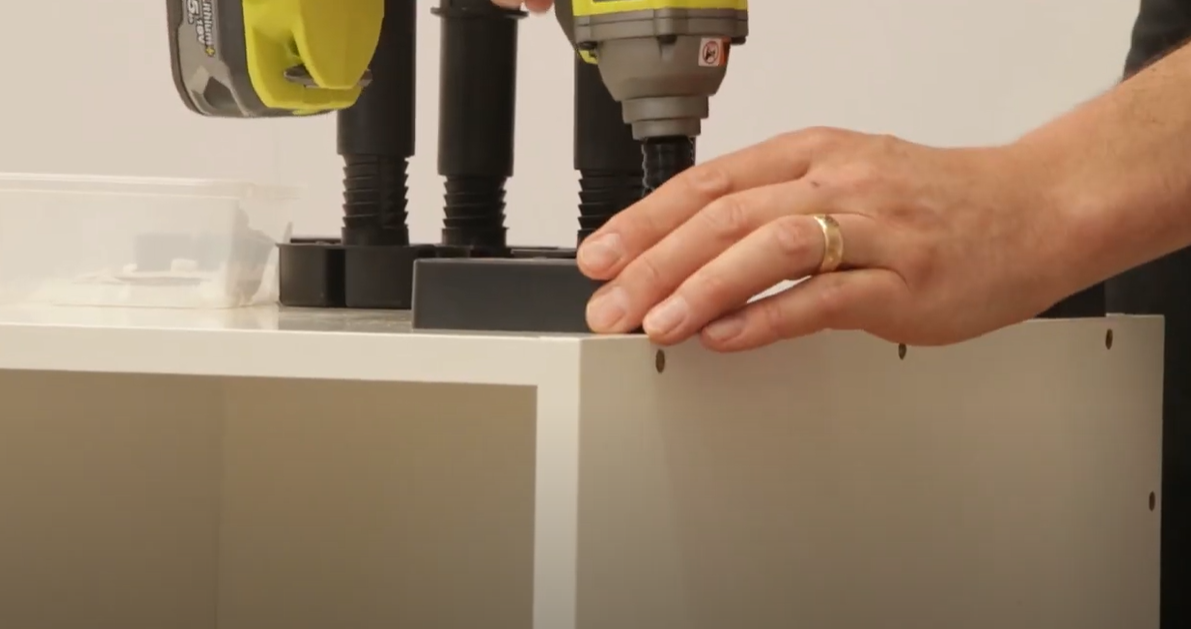
Initial Adjustment: Start with the cabinet positioned at the identified lowest point. Adjust the legs at this location to make the cabinet top level. Adjustable legs can be twisted by hand or with a screwdriver for precise height modifications.
Align and Repeat: Move the cabinet to its intended location and place a spirit level on top. Adjust each leg until the bubble indicates a perfectly level position. It's crucial to adjust the legs so that the cabinet is level both front-to-back and side-to-side.
Step 3: Securing the Cabinets
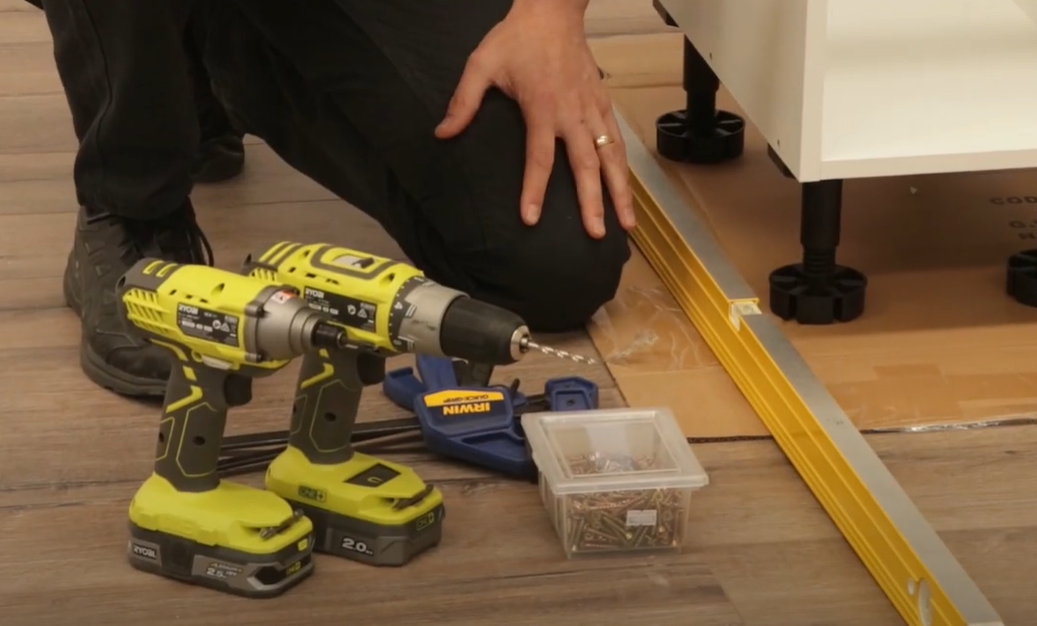
Joining Cabinets: If you're installing multiple units, ensure they're level relative to each other before securing them together. Use clamps to hold the cabinets in alignment, then drill and screw them together.
Step 4: Final Checks and Finishing Touches
Comprehensive Level Check: With all cabinets installed and joined, conduct a final level check. Adjustments should be minor but are crucial for a perfect finish.
Install Kickers and Cover Panels: Kickers and end panels conceal the legs and provide a clean, cohesive look. Measure and cut these pieces to fit, then secure them according to the manufacturer's instructions. Any cut raw edges when fitting the kickers and end panels will need to be silicone sealed to prevent any moisture or water contacting them and causing swelling.
Adjustable cabinet legs are a game-changer for DIY enthusiasts and professionals alike, offering the precision needed for a flawless installation. By following these steps, you can ensure your cabinets are not only visually appealing but also structurally sound and level. Remember, patience and attention to detail during the adjustment process will result in a stunning and enduring renovation.
Tips for Success:
- Take your time with the initial floor assessment; understanding your workspace is crucial.
- Double-check the level of each cabinet after any adjustments.
- Use quality tools to ensure accurate measurements and adjustments.
Your journey to mastering stability in cabinet installation begins with knowledge and ends with the satisfaction of a job well done. For more insights and expert advice on home renovations, stay tuned to our blog.
Recent Posts
-

Upgrade Your Space with the Perfect Fit Series – New from The Sink Warehous
Your kitchen is more than just a space—it’s the heart of your home. Whether you're …14th Apr 2025 -

Mastering DIY: The Sink Warehouse's Flat-Pack Cabinet Assembly & Installation Guides
Ready to upgrade your kitchen, laundry, or bathroom with DIY flat-pack cabinets? The Sink Wareh …14th Apr 2025 -

Built to Last: Häfele Hardware with a Lifetime Warranty
When you're investing in a new kitchen, laundry, or cabinetry upgrade, you want more than just …14th Apr 2025